
- 17Jul2015
-
Grouping Checkboxes in Excel
Grouping checkboxes will help to keep the checkbox values discrete. We may also need to group the checkboxes in order to move or resize them as per requirement. Grouping helps to take control on all checkboxes at a time.
Grouping checkboxes in Excel:
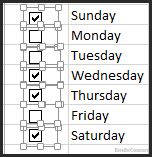
After inserting checkboxes onto the worksheet. Select all check boxes as shown in the image below.
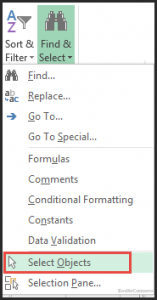
If there are many checkboxes/objects to select then try Select Objects feature as shown in image below. This is available in editing section in the Home tab from the excel ribbon.
After selection is finished hit select Objects again to disable this feature.
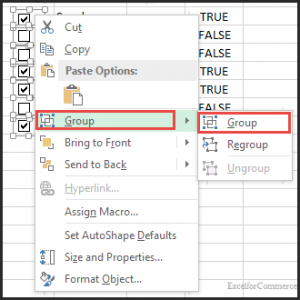
Now, right click on the check boxes and Select Group and from the sub menu select Group.
Make sure that the controls are well aligned to each other. Checkboxes must not be overlapped on each other.
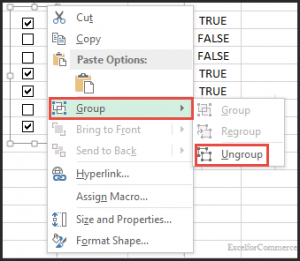
Similarly we can Un-group and Regroup the checkboxes.
To Move the Controls:
Select the control and right click on it then select the option as per requirement.
To move the control one layer up, click Bring Forward.
To move the control to the top layer, click Bring to Front.
To move the control one layer down, click Send Backward.
To move the control to the bottom layer, click Send to Back.This is how we group checkboxes in Excel. Still have queries? Please feel free to contact us here.
- 17 Jul, 2015
- Excel for Commerce
- 0 Comments
- Excel Consultant, Excel Expert, grouping checkboxes in excel,

Comments